SO since a very long time I wanted to try out pihole just for the fun of it but never took action to actually try it, but recently I realised I’m scrolling too much of twitter and youtube so i wanted to try out a network level site blocker.
I assumed it would be a fairly straight-forward thing to do as DietPi makes it easy to install pihole anyway. But later I realised that it a tad bit difficult to do it because nearly all the tutorials I browsed through all gave a walkthrough on how to set it up at the router so that all your devices connected to the Wifi network would use the Pi zero as their downstream DNS . The thing I wanted though was how to use the Pi just as a DNS for the devices I use at home and not all other devices, for which there were no tutorials which I came across so this is my attempt at making one.
Though there is the solution to just use a public DNS like 8.8.8.8 on other devices but thats too much of a hassle.
Part 1: Installing Pi-hole on the Raspberry Pi Zero 2W
I’m using DietPi, a lightweight and optimized Linux distro for SBCs like the Raspberry Pi, which makes the Pi-hole installation a breeze via its included software manager.
Step 1: Initial Setup and Software Selection
After installing DietPi on your Pi Zero 2W and completing the initial setup, you’ll reach the DietPi-Software menu.
Using the command
1 | dietpi-software |
Browse Software: Choose ‘Browse Software’ to see the full list.
Select Pi-hole: Scroll down and use the spacebar to select Pi-hole: block adverts for any device on your network.
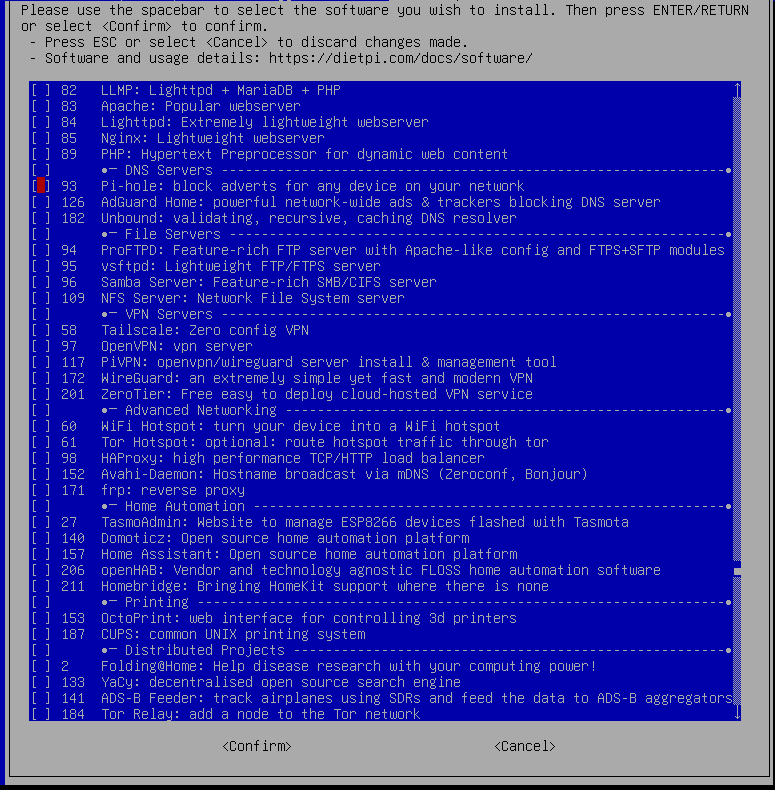
Confirm and Install: Select
<Confirm>at the bottom of the list. Then, back in the main DietPi-Software menu, select the highlighted Install option and hit Enter. Your screen should look like this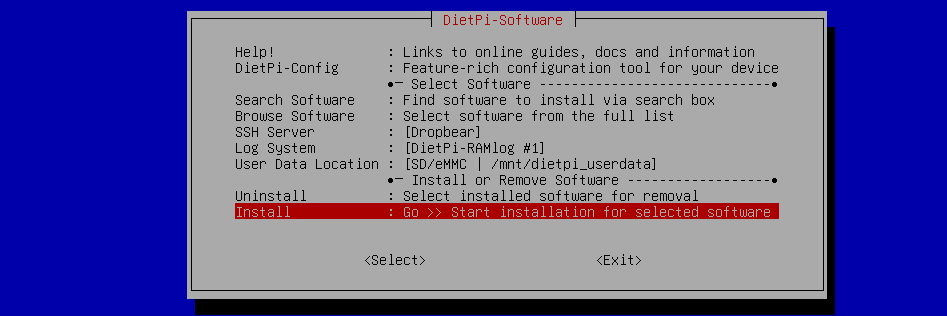
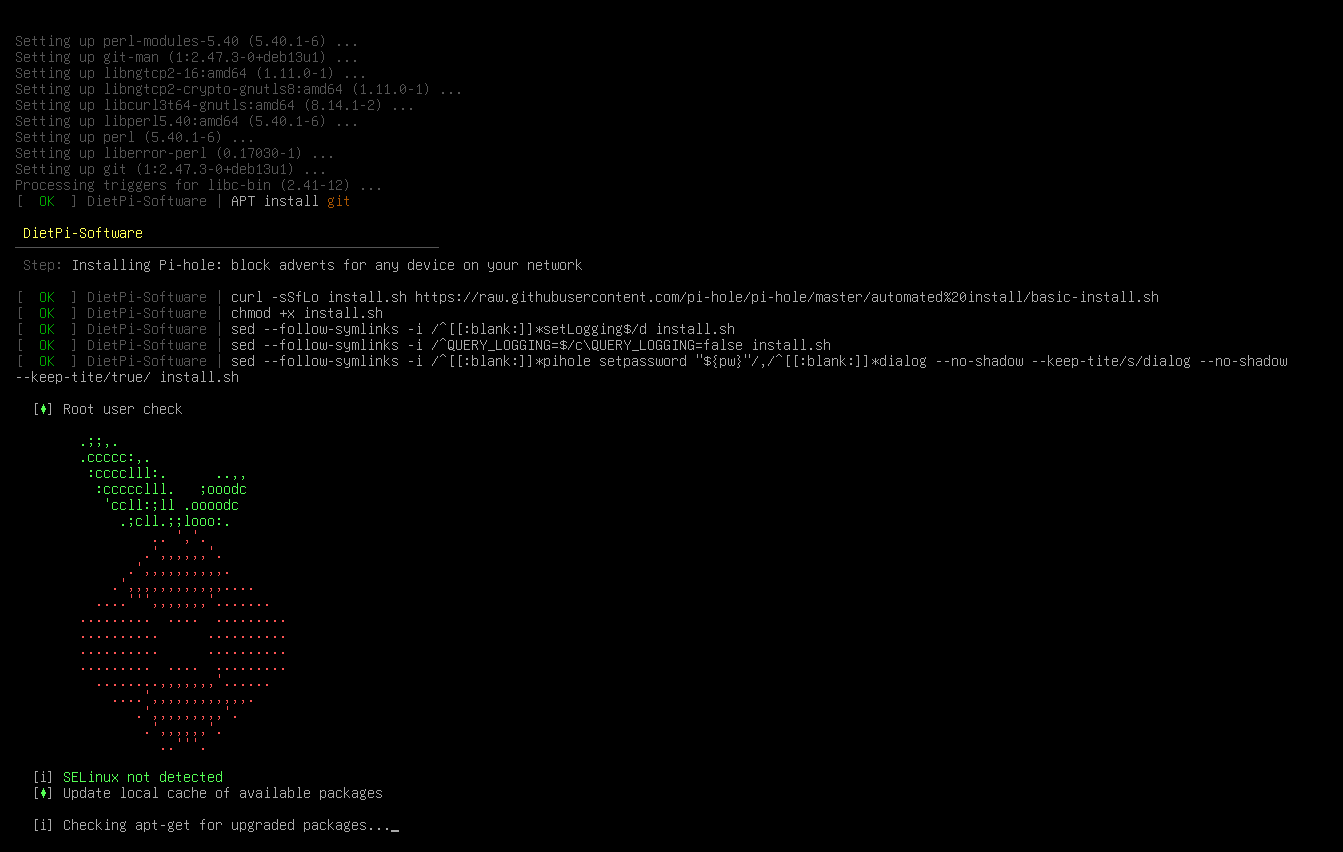
Wait for Install: DietPi will now download and install the Pi-hole software. This process includes showing the official Pi-hole welcome screen.
Step 2: Pi-hole Configuration
The installer will guide you through a few essential setup screens.
Static IP Requirement: Pi-hole needs a static IP address to function correctly as a reliable DNS server. You may see a prompt for this. If you haven’t set one yet, you should do so now, either via DietPi-Config or by reserving the IP on your router using the Pi’s MAC address . It’s called DHCP reservation on , depending on the router you have there would be different screens to navigate through.
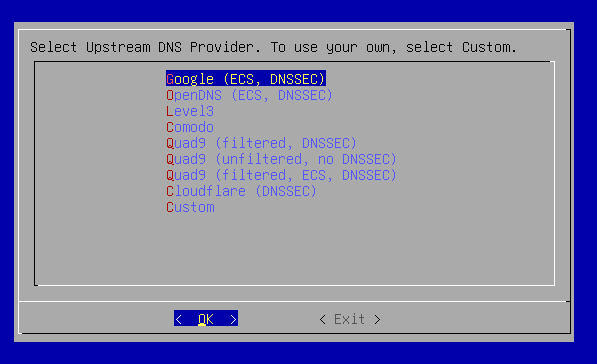
Upstream DNS Provider: Select an external DNS provider that Pi-hole will use to resolve domains. Google, Cloudflare, and OpenDNS are common choices. I have chosen google as my upstream DNS provider
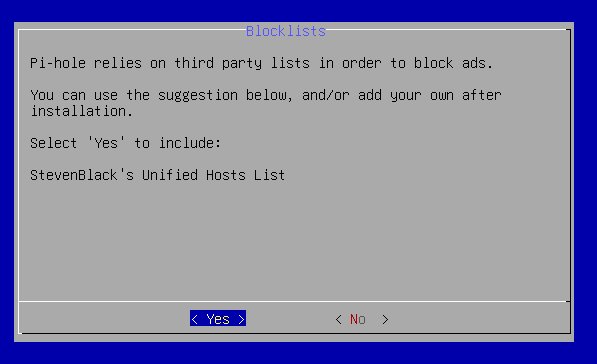
Blocklists: The installer will ask if you want to include a default blocklist. Say Yes to get started with ad-blocking immediately. The default one on screen is good enough.
-Password- After the setup use command
1 | pihole setpassword |
to change the password from the default text slop to whatever you wish
Once the configuration is complete, you’ll be given the admin password for the Pi-hole web interface (http://[Your Pi's IP]/admin).
Part 2: Configuring Individual Devices for Selective Blocking
This is where i didnt find any documentation and even LLM’s werent reliable.
For this to work reliably, your device needs a fixed network configuration so it always knows how to find the router and the Pi-hole.
The Problem with DHCP (Automatic IP)
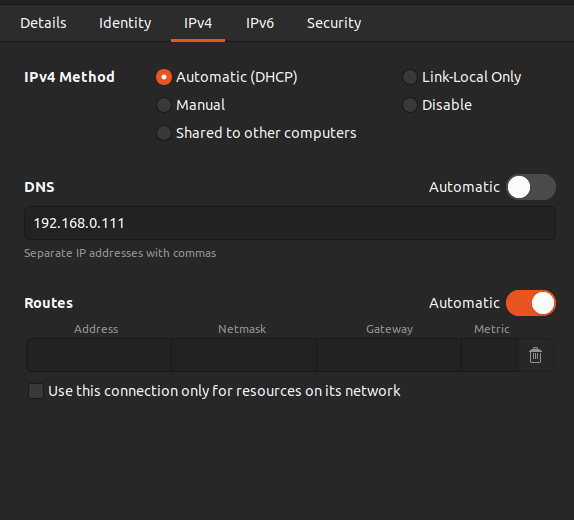
When a device is set to Automatic (DHCP), it gets its IP and DNS server from the router. The router usually tells it to use the router’s preferred DNS, bypassing your Pi-hole.
The Simple Solution: Manual Network Configuration
To bypass the router’s default DNS and point a device directly to the Pi-hole, you must set the device’s IP configuration manually.
Here is the process, using an Ubuntu device as an example:
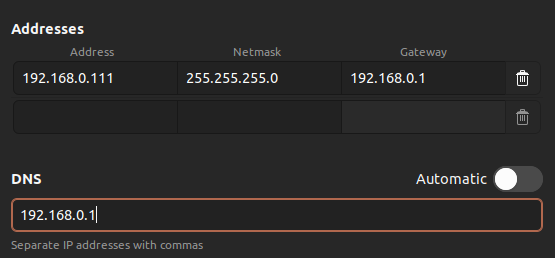
Change IPv4 Method to Manual/Static: Go to your device’s Network Settings and change the IPv4 method from Automatic (DHCP) to Manual (or Static).
Set Static IP Address:
- Address: Enter a fixed IP address for the device. Pro Tip: Use your router’s DHCP reservation feature (based on the device’s MAC address) to ensure the router never assigns this IP to another device, and then manually set it here. (e.g.,
192.168.0.111). - Netmask: Use the standard subnet mask for your network (e.g.,
255.255.255.0). - Gateway: Use your router’s local IP address. This is how your device accesses the wider internet. (e.g.,
192.168.0.1).
- Address: Enter a fixed IP address for the device. Pro Tip: Use your router’s DHCP reservation feature (based on the device’s MAC address) to ensure the router never assigns this IP to another device, and then manually set it here. (e.g.,
Set DNS to Pi-hole’s IP:
- In the DNS field, enter only the local IP address of your Raspberry Pi Zero 2W with Pi-hole installed. (e.g., if your Pi’s IP is
192.168.0.100, use that).
- In the DNS field, enter only the local IP address of your Raspberry Pi Zero 2W with Pi-hole installed. (e.g., if your Pi’s IP is
By doing this, you are instructing this specific device to send all its DNS queries directly to your Pi-hole device.
- Save and Reconnect: Save the network configuration and reboot the device to see the changes.
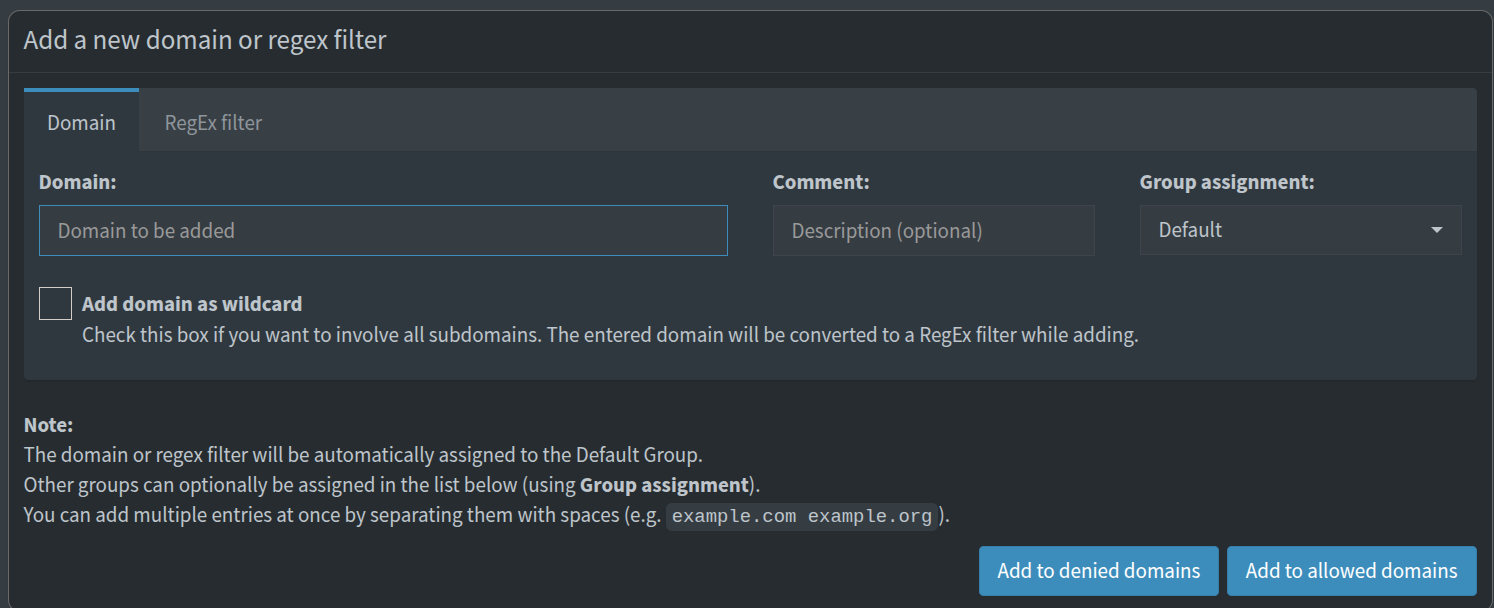
Part-3: Blocking any sites
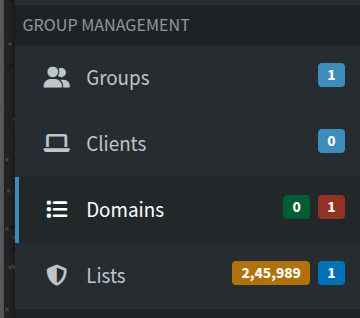
1.Go to your Pihole admin dashboard:Navigate to group management section in on the left hand side sidebar on the page
2.Enter the URL of the website: In the provided “Domain to be added” bar enter the domain address.
3.Click on Add to denined domains:This succesfully adds a domain to your blocked list.